Now that you’re on the path to publishing a book you’re probably exploring ways that you can get the word out about your accomplishment. A great tool for spreading the news is social media! Particularly, if you’re looking to specifically set up a Facebook Author Page then you’re in the right place.
Step One: Make sure you have a personal Facebook account
Facebook does not allow users to make public pages without first having a regular Facebook account.
Wait, I thought that my Facebook account was my “author page”…
Some people do use their personal Facebook page as their author page, but you are missing out on valuable tools if you only use your personal page for your author updates.
Facebook “business pages” are public sites where you can “follow” a business, brand, or person. As a result, your friends and family that you’ve connected with on your personal Facebook account won’t be inundated with posts about your author brand and book unless they officially “follow” your author page.
This is also helpful because you can allow readers, fans, and other people you might not know personally to follow along with updates on your Author Page without being connected to the posts that you share on your personal Facebook page.
Step Two: Log in to your Facebook account
Once you create a personal Facebook account, be sure to log in so you can get started setting up an Author Page.
Already have a Personal Facebook account? Great news! Get started by logging on.
Step Three: Scroll down on the left-hand side of your screen and select ‘pages’
Step Four: Click the ‘Create new page’ button
Step Five: Create your author page!
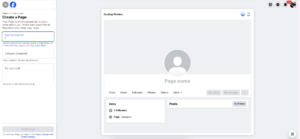
Congratulations! You’ve just created your Author Page, woo-hoo! So now it’s time to get it set up to make sure that you’re putting your best foot forward on social media.
Setting Up Your Author Facebook Page
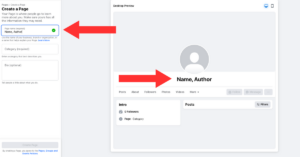
Step One: Select your page name
Start by adding a name to your Facebook page. We usually recommend adding “author” or “writer” or something similar after your name so visitors know exactly what your page is for when they first visit:
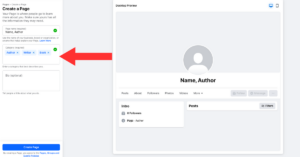
Step Two: Select your category
Categorizing your page helps Facebook users find it depending on their interests and social media algorithm. We’ve included some examples of how to categorize your page in the image below:
Step Three: Add your author bio
Facebook has a character limit on your page bio, so we recommend keeping this short and sweet! Make sure the most important information appears in your bio:
- Title and release date of your upcoming book
- Title(s) of any books you’ve previously published
- Awards or accolades such as “award-winning author,” “bestselling author,” “Amazon #1 release,” etc.
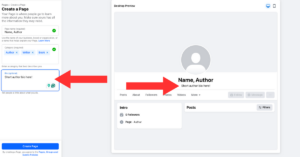
Step Four: Create your page!
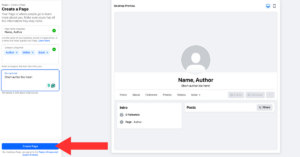
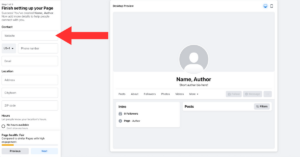
Step Five: Finish setting up your page
Facebook will prompt you to add in some contact information; provide the information you feel comfortable with and know that some of these items could be shown publicly on your profile. To protect your privacy, we recommend that you either do not include sensitive information such as your address, phone number, etc., or toggle your privacy settings to hide information you do not want to share publicly.
However, we would strongly recommend including your author website!
Step Six: Add your cover photo and author headshot
We recommend you keep your headshot consistent across all your social media platforms and your author website. This is not necessary, but it helps readers identify all your accounts across platforms easily!
What is a cover photo? A cover photo appears at the top of the Facebook page and it provides the visitor with immediate additional information about your page. This space is prime real estate, so use it for timely announcements or the highest leverage information you want a visitor to take away when visiting your page.
Need help designing a beautiful, professional, and informative cover photo? We’ve got you covered (ha)! Reach out to us here to inquire about our design services!
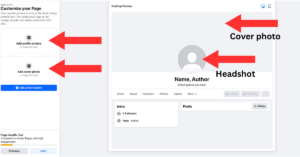
Here’s an example of how your headshot and cover photo will look on your author page using Books Forward author Evette Davis as an example:
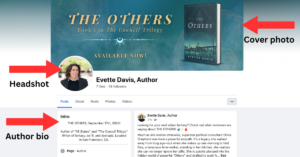
- Evette’s cover photo conveys the most important information: her latest book, THE OTHERS, is out now.
- The featured headshot is professional and consistent across her social media platforms.
- Her bio is short and contains the most important information:
- Release of her most recent book
- The titles of her previous books
- The type of author she is: “sci-fi and dystopian”
- And where she’s located
Step Seven: Add a call to action
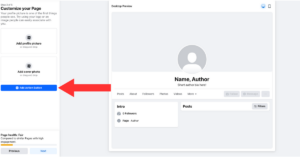
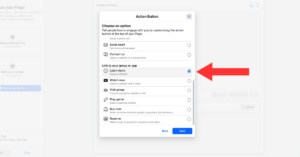
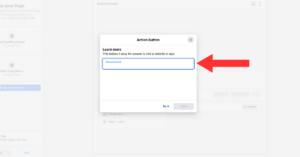
We recommend choosing the “learn more” call to action button and linking where visitors can buy the book. Because your website will be in your contact section, and thus there is no need to list your website again here. Consider linking your buy page on Bookshop.org, as this website supports independent bookstores, which readers love supporting!
Step Eight: Invite your friends
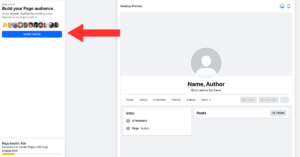
When you click “invite your friends” Facebook will send invitations to all your Personal Facebook friends to “like” and “follow” your account. Before sending off the invitations, there will be an option to send the invites to your entire friend list or choose a select number of people to invite.
Indeed, this is helpful because this feature allows you to kickstart your follower base on your Facebook Page.
Step Nine: Start posting!
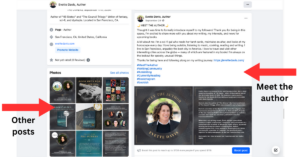
Above are some examples of Evette Davis’ posts on Facebook. Firstly, she started out posting a little bit more about herself in her Meet The Author post. For more posting inspiration, check out her full page here.
Once you’ve set up an Author Facebook Page you can also advertise through Facebook, which can help open up more opportunities for you and your book! Interested in learning more about how to use social media to your advantage? Drop us a line to learn more about our social media management services!

A literary omnivore and influential Bookstagrammer, Layne applies her vivid creativity for every title we promote by deftly coordinating news coverage and events for authors, writing and editing diverse content for social media, and assisting with Books Forward’s social media engagement initiatives.
As a former special education teacher, Layne firmly believes in the importance of literature and accessibility. This unique point of view is an asset in her publicity efforts as she works to reach readers across various platforms and demographics.
Layne received her Bachelors of Arts in Creative Writing and Bachelors of Science in Psychology from Virginia Polytechnic Institute and State University, and her Masters of Art in Teaching from Relay Graduate School of Education. She lives in New Orleans with her loyal, but sadly illiterate cat, Macaroni.
